Better photos when you learn about your camera

MaryWang_Mobius
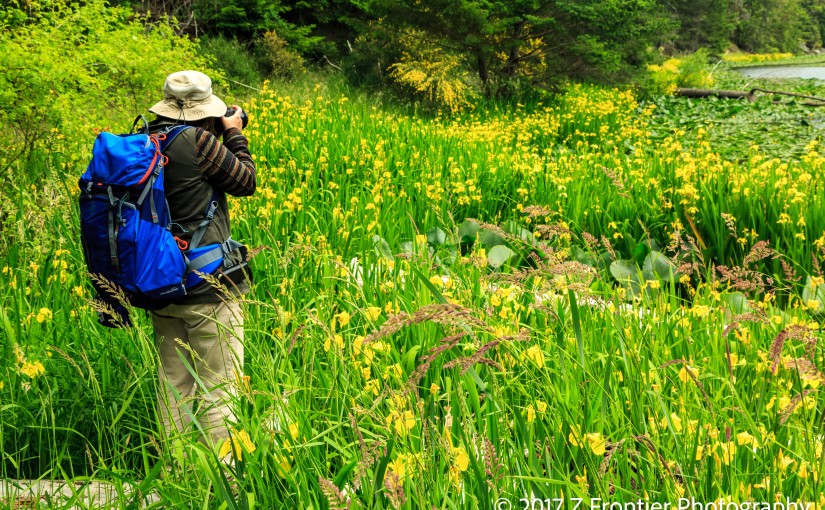
It really doesn’t matter if you are using a camera in a smartphone (e.g., iPhone) or an expensive DSLR (Digital Single Lens Reflex) camera, a better understanding of how to manipulate the camera controls will improve your photographs. Frankly, the best camera is the one that you have with you at the time you want to capture an image.
 
Almost any camera or smartphone camera will take great photographs for social media, journals, or scrapbooks. If you want to have images to print and hang on a wall, you should consider getting a DSLR. Many consumer-priced DSLRs have the same sensor and many of the same features of the professional cameras and may have many more capabilities than you will ever use. A DSLR will also allow you to use a greater variety of lenses and filters and can provide better pictures in low light conditions. Keep in mind, the more stuff you have, the more stuff you will need to learn to use. However, even as very competent photographers, we will often use our smartphones to take pictures while we are casually touring about. So, don’t stress about what camera you use. Just be sure you are confident about how to use it.
 
There are many ways to learn about the various camera controls and settings. My favorite is to just start experimenting by pushing buttons, selecting different options, taking test photographs, and looking at the results. This approach works well if you have some prior experience and understanding about what the buttons and menus on the camera should do. If you are not familiar with the symbols on the buttons and terms on the menus (e.g., contrast, HDR, etc.), then you might need to spend some time learning some basic camera language. You can read about some of the functions and features of your camera in the manual. However, most manuals are difficult to read and assume you already have some familiarity with the terminology. Frequently, there are books written in a much more user-friendly format for most of the popular camera models. If you read one of these books, the manuals provided with the camera can serve as a useful pocket reference guide. We always carry a manual in our camera bag. Sometimes it easier to use the manual as a reference to locate a specific function than it is to search through the menus. A sophisticated DSLR camera can do an amazing number of things. However, remembering how to access all these functions on a new camera can be a challenge.
 
Another good way to get familiar with the terminology and camera features is to take an introductory class to photography. These are often taught through a local college or university as an extension course. They are relatively inexpensive and usually taught during the evening or on weekends. These classes tend to be somewhat general and won’t necessarily help you learn your specific camera. There are so many brands of cameras and smartphone cameras; it is virtually impossible for an instructor to know all the ways to modify the settings for all cameras. Fortunately, the common settings are usually pretty obvious.
 
Videos on the internet can also be excellent resources. YouTube is an amazing source of information. There are hundreds of videos providing introductions to photography. Conduct a search on YouTube for Basic Photography or Introduction to Photography to see some of the variety of videos available. If you search for the make and model of your camera or smartphone, you will likely find some very specific instructions on how to manipulate the various controls on the camera. Once you watch videos from different sources, you will find that the capabilities and approaches of the instructors will vary. Find those that present the material to you in a manner that is most helpful to you.
 
It is often better to learn skills and camera features in small doses. After you have learned some basics, get out and experiment. Then as you become comfortable with a style or camera feature, learn something new and then try it out during your next photography session. Even professionals will confess that they are always picking up new skills or experimenting with new approaches.
 
In all cases, once you get familiar with some of the basic terminology and functions, go out and practice. Digital film is really cheap! There is a great benefit to experimenting.

Intimate Landscapes

When we arrive at National or State Park in the United States or Canada, we are struck by and often overwhelmed by the shear majesty of the vistas.  Our desire to capture this majesty is our first thought.  How should we compose a photograph that will help bring our followers to this wonderful location and help them have a connection to the landscape?

However, after watching a couple of YouTube videos from Ben Horne and Thomas Heaton, I was reminded that these same locations provide an opportunity bring the viewer into a smaller, more intimate relationship with the environment.

Switching from a big vista mentality to small intimate landscapes takes some work.  More importantly, it requires looking at the environment in a new way.  The subject becomes a much more significant part of the image.  We often talk about the subject as if we were referring to a model.  The subject is the glue that holds the image together.

Selecting a subject that works is often more tricky than it appears.  It has to have enough interest to attract the eye of the viewer.  In order to create the visual interest we strive to accomplish several goals.  First and most important, the subject has to be interesting.  It really doesn’t matter if it is a bush, a tree, or a rock.  It has to be unique enough to anchor the photograph.

Next you have to create a composition that distinguishes the subject from its environment.  This can be done many ways, but the goal is to give voice to the subject – “Here I am”!  We end up discarding many really interesting subjects because we can’t create the separation giving voice to the subject.

Getting the subject to stand out from its environment requires using various techniques or camera angles.  A green tree on a green background may not give you enough contrast to allow the subject to sing.  Perhaps capturing the photograph with a beam of sunlight on the subject may be enough to separate the subject from the background.  However, light alone may not be enough.

Many of us who shoot vistas try to get as much sharpness in the photograph from the front to the back.  However, when shooting intimate landscapes, we can use depth of field to create separation between the subject and the background.  Portrait photographers who work outdoors frequently use this technique.  A background that is out of focus can help your viewer’s eye zero in on the primary subject of the photograph.

Simplicity is your friend.  Look hard at your composition for distractions.  A dead branch lying on the ground can draw the eye away from your subject and kill an otherwise strong composition.  I am often guilty of missing really bright rock that my eye “edits” from the composition but the camera captures.  This is one of the few times, where I may potentially “edit” the composition in real time to remove distractions from the image, by moving a dead branch just outside the frame of my composition.

The light is always important for landscapes.  It is no different for shooting intimate landscapes.  However, in these situations we are often looking for reflected light or diffuse light.  Zion National Park is a wonderful example of a place where you can work with reflected light from the steep canyon walls.  The diffuse light on an overcast day can also work well.   It is still possible to create interesting intimate landscapes in more intense light, but then the light may become more of a subject matter in the way it is seen as light-beams or based on the play of light areas and deep shadows.  In high contrast situations with more intense light, consider trying some black and white images.

Using your camera’s “Live View” mode or working with a loupe on your image playback screen can be very helpful.  This can really help with looking critically at the image   while you are set up and then making adjustments if necessary.  In some cases, by stepping away from the image for a few minutes and then taking a fresh look, you will find you can look more critically at the whole image.  We are lucky because we often have each other to look at our photographs critically in the field.  While reviewing your image, ask yourself “Is the subject separated from the background; is it singing out its presence?”  Are there distractions competing with your subject?  Has the camera captured your vision?  Be critical while you still have the chance to make changes.

Practice your skills with intimate landscapes.  Like so many things in photography, this a technique that may take some time to perfect.  Because these images are not reliant on big beautiful vista, interesting intimate landscapes can be found almost anywhere.  Practice anywhere close to home and use this skill when you get out to a favorite National or State park.

Efficient Workflow=Better Photographs

Professional photographers talk about getting photographs efficiently.  They want to capture the commercial images as efficiently as possible, with little fuss.  If they can capture the image in one shot, why would they want waste time taking more?  Instead, they should be off to do another job or get the images ready for the client.  A particularly important aspect of capturing images efficiently is working with the tools of the trade without expending time and energy thinking about where to find gear and accessories, messing around in a complicated set of bags or boxes, fussing around to assemble the equipment, or trying to remember how to adjust camera settings.  For landscape photography, this means being able to get tools out of the bag and ready to shoot quickly and efficiently.  When the light conditions are ideal, you need to be able to start capturing the images quickly because the best environmental conditions may be fleeting.  It is also important to be able to break your kit down, move to a new location, and get set up again quickly, efficiently and correctly.  This process is your in-field workflow.

When you have developed the process for unpacking and assembling your gear with a workflow that works for you, it is critical to practice; do it over and over again until it is absolutely ingrained in your hands.  You will notice I said hands not head.  Getting ready to shoot should come from muscle memory.  A landscape photographer should be able to get their gear out of the bag, get it set up and be ready to shoot in the dark.  We attended a Master Photography Class from Randall J. Hodges last spring.  One of the exercises was getting the gear out and ready to shoot images in less than 2 minutes.  Furthermore, this timing should be the goal for all environmental conditions, including when it is raining, snowing, and blowing.  Frankly, weather often contributes to the most dramatic and unforgettable images.   So if you are serious about capturing impressive pictures, you need to be able to put your gear together efficiently under inclement conditions.

There are many ways to develop your in-field workflow.  It will depend on the type of gear you have, where you are shooting and you may need to alter it for different weather conditions.  Here is an example based on a recent shoot in Death Valley.

  1. Before leaving home or camp: 
    1. Check camera is working.
    2. Put camera back to “Standard” settings.
      1. Aperture Priority
      2. ISO 100
      3. Landscape Mode
      4. Aperture at f/22
      5. Spot metering
      6. Exposure compensation at 0
      7. White balance at 6000k
      8. Autofocus – off
      9. Stabilization – off
      10. Long Exposure Noise Adjustment – off
    3. Take a minute to ensure that the camera bag has no holes.
    4. Confirm all the batteries are charged and at least one spare is packed.
    5. Check for the memory card and confirm there is at least one spare.
    6. Check that the necessary lenses are clean and packed.
    7. Confirm the shutter release cable is packed.
    8. If appropriate, check that the suitable filters, filter holder, and appropriate adapter rings are in the bag.  At a minimum, there should be a polarizer in the bag.
    9. Check that tripod is in good working order.
    10. Pack appropriate snack and drinks.
    11. Check that all appropriate clothing is ready when needed (e.g., warm gloves, etc.).
    12. If hiking, make sure hiking poles are ready and in good working order.
    13. Confirm you have maps, and/or GPS, and a small medical kit.
  2. Packing the bag: 
    1. We pack our bags the same way every single time.  We can find any piece of gear in the bag by feel.  This accomplishes two functions.  We know where every piece of gear is located.  We are much more likely to notice the absence of gear.
    2. Check and double check the time to arrive at the shooting location and confirm time required to travel from camp to the location (by vehicle if necessary and for any planned walking).  Ensure everyone knows the departure time.
  3. Departure:
    1. We plan to arrive at the location about 30 to 40 minutes before the anticipated optimal light conditions. Since, the light and clouds can be difficult to predict, we often want to allow enough time to evaluate several compositions at a location.  If necessary, we can adapt our position quickly in case the light develops better in a slightly different direction (e.g., northwest versus west).
  4. In the field camera setup (Shawn’s method): 
    1. Remove tripod from backpack, fully extend the legs, and place on level ground.
    2. Remove camera and attach it to tripod.   Make sure the camera is secure before starting any other step.  A dropped camera could end your photography trip!
    3. Attach the shutter release cable to the camera.
    4. Attach polarizer (if necessary), or attach filter ring and holder (if necessary) and place filter bag on hip.
    5. Check camera settings (see 1b).
    6. Check lens for dust and clean if necessary.
  5. Taking the photograph: 
    1. Adjust the tripod placement and height for the anticipated composition.
    2. Compose the shot in the camera
    3. Level the tripod/camera
    4. Turn on Live View (I use live view to compose, focus and evaluate image)
    5. If using a telephoto lens, adjust the focal length
    6. Focus (use 10X magnification button to confirm accurate focus)
    7. Evaluate the composition and make necessary height and angle adjustments
    8. Adjust picture style setting if necessary (e.g., landscape, standard, monochrome)
    9. Modify aperture and ISO, if necessary
    10. Modify white balance, if necessary
    11. Modify exposure compensation, if necessary
    12. Check composition again
    13. Refocus
    14. Take a deep breath
    15. Take the shot
    16. Evaluate the shot on the LCD screen with a loupe and using the magnification button.  I may make one or more minor adjustments (e.g., exposure compensation) and then take an additional shot.   Then I will determine if there any changes required to the composition.  For any change to the camera height, angle, or focal length, I will then go through these “b” steps again.  Generally, I delete my test shots once I have one I want to keep.
  6. Putting the gear away:
    1. Finished for the day/night on a lovely morning/evening
      1. Take filters off, clean, and put them away
      2. Remove shutter release and put it away
      3. Change camera back to standard settings
      4. Remove camera from tripod, put on lens cap, and put away
      5. Take down tripod and attach to camera bag
      6. Take out head lamp (if necessary)
      7. Adjust camera bag and walk back to camp or vehicle
    2. Finished in poor weather conditions
      1. Take filters off and put away; clean back at camp
      2. Remove shutter release and put it away
      3. Leave camera settings to modify back at camp
      4. Remove camera from tripod, wipe lens, put on lens cap, wipe down camera if wet, and put away.
      5. Take down tripod and attach to camera bag
      6. Take out head lamp (if necessary)
      7. Adjust camera bag and walk back to camp or vehicle.

When we are shooting for several days, I like to have my camera bag ready to go for the next outing as soon as possible.  So, I once back at camp, I’ll change to a fresh battery and swap the memory card immediately.  This is especially true if we are going to be getting up early to shoot a sunrise.

A good exercise is to write out your own in-field workflow.  If you have trouble, it is probably because you don’t have one.  This is easy to correct.  In the comfort of your living room practice putting your gear together.  See what works and what doesn’t.  Once you have a system that works for you, practice it over and over until it feels completely natural.  Once you have a comfortable workflow, you will have less stress in the field, you will take better photographs, and most importantly, you will have the time to enjoy the wonderful experience of being out in beautiful, natural surroundings.

My Best Tip for Better Photographs

I am generally a pretty friendly guy when out shooting landscapes.  Being friendly, I often get a lot of questions.  The questions range from “what camera do you use?” to “why do you have those filters on the front of the camera?”.  The former question will almost always lead into a discussion of why some other brand of camera is better than the one that I am using.  Frequently, this comment is followed by a long dissertation about equipment in an attempt to show off technical knowledge about cameras and lenses.  However, I was recently asked by a young fellow what single piece of advice I would recommend to a novice landscape photographer that would make a significant improvement in their photographs.

At first, I was tempted to throw out something about learning your camera, or taking a class or in-field workshop from one of the many wonderful landscape photographers.  Education is something that I highly value.  While I pondered my answer, I noticed that his camera was still in the bag.  I asked if he intended to take some photographs.  To my surprise, he said no, he was on his way to dinner.  I would love to be able to tell you that I gave him some inspirational answer before he wandered off.  Unfortunately, my brain doesn’t work that fast.

A few months went by before the question popped back into my head.  We were at a camera club meeting and I happened to overhear a conversation between two fellow photographers.  They were discussing the various merits of using filters versus high dynamic range (HDR) techniques.  The conversation went back and forth for a while before I realized neither had ever actually used either technique.  They were full of knowledge and opinions but had no experience.  It was at that point, the young man’s question came back to me.

The answer I wished I had given the young man to become a better photographer  was practice.  Take your camera out of the bag and use it!  I would add that there has to be intent behind the practice to make it really useful.  Shooting with intent means practicing specific skills in a wide range of conditions.  It also means critical evaluation of the results.  For landscape photography, this often means getting up before the sunrise or being out after sunset.  It means doing the work to put yourself in the best situation to catch the very best light and composition and practicing with the equipment you have to learn what will happen when you shoot with a variety of camera settings, elevations, angles and lenses.  Practice taking photographs from different heights, and learn how getting down lower to the ground affects the composition.  Practice with wide angle and telephoto lens to see what impact they will have on your composition.   Try out a variety of techniques, including using neutral density gradient filters and/or the methods for HDR photography.   Learn about focus stacking and try it out during a photo session and with the associated digital darkroom methods.

I am a big fan of education.  However, you gain virtually nothing if you do not go out to practice what you learn.  Having more knowledge without experience will not make you a better photographer! Perhaps your first attempt at a new skill will not yield great photographs.  This happens to me all the time.  However, don’t give up after one disappointing attempt.   Do some more research (e.g., reading or videos) and try the technique again and again.   With practice, the knowledge will yield greater proficiency and more satisfying images.

Another reason to go and practice a skill is that it helps you learn when it will be most useful.    You may know how but do you know when and will you recognize the opportunity when it arises.  In my experience, recognizing the opportunity only comes with a lot of practice.

So my advice to that young man is to forget about going to dinner.  Get your camera out and practice with intent, practice your skills and take more photographs, lots and lots of photographs under all types of different conditions and then critically analyze the results.  Then start all over again!

Adaptation to New Conditions

It is getting extremely busy and challenging to create photographs in the iconic spots, like Antelope Valley. We have taken the approach that these challenges are unlikely to change and started to look for ways to deal with the situation. To a significant extent we have started focus on less popular and harder areas to access. We also decided to up our skill level. We took a Masters Photography course last spring. The most important thing we got out of the class was being ready to get the “shot”.   One of the goals of the training was preparation to shoot in Antelope Valley.  Before we joined the photo-tour of Antelope Valley, we went to one of the less popular slot canyons (on Wire Pass Trail) and spent the day practicing with the settings we would need use in during the Antelope Canyon tour. We even did some count-down shooting (getting a shot under strict time constraints). It was great training and made the difficult conditions during the photo tour much more manageable. We also found that since we were really prepared, the Tour Guide was much more willing to work with us.  We have worked the training into our work flow and had the chance to use it several times since last spring.   Adapting to crowds is going to be the new normal and being prepared is at least part of the solution.


What camera should I buy?

RockyShore_iphone-0044“I want to take better pictures.  What camera should I buy? ”  Corinne and I get this question a lot.  In most debates over what camera is better, we have little experience and as a result have little to contribute to this discussion.  However, we believe that for new photographers, this is the wrong question.

Let’s be very clear!  Every modern digital camera has the ability to take stunning photographs.  Every camera has its strengths and weaknesses and at a professional level there are some cameras better suited to certain types of photography (e.g., landscape versus wildlife photography).  However, for new photographers, the make of camera matters very little.

So when we are asked, “what camera should I buy?”  we turn the question around and ask “what camera are you using today?”  Frequently, they will hold up their mobile phone, a point-and-shoot camera, or entry-level digital single lens reflex camera (DSLR). We then ask what they think is wrong with their current camera?  Generally, we get a mumbled response that they aren’t getting the photographs they want and they believe the limitation is the camera.

Recently, in response I (Shawn) have been pulling out my mobile phone and showing a series of pictures.  I get the typical response of “aren’t they lovely” and “I can see what you can do with a really good camera”.  With the prey secure in my trap, I point out that all of the photographs they just looked at were taken with my mobile phone.

It’s only after that demonstration that I can address the real question, which is “what should I be doing to take better pictures? ”  Frequently, I ask if they have looked at their camera manual, watched any YouTube videos, or taken any general photography classes?  For most folks, self-learning from a manual or by trial-and-error is difficult.  So, we suggest they take some instruction, either from a professional photographer in the area of photography they like, at a local community college, or from an online class.


Dinghy_iphone-0052

Sometimes the problem is not with the camera that they use, but with fundamentals of setting up their shots.  When photographing people, consider locations where the light is not harsh (e.g., under a shady tree) or where the shadows on their features are minimized.   Eliminating or reducing the sky may prevent the subjects from becoming too underexposed in relation to the surroundings.  For landscapes, a little effort to review the composition can make a huge difference.  Moving to a better vantage point or stepping forward to “crop out” the distracting clutter may help.  Compositions that include some interesting foreground components (e.g., wildflowers, beach driftwood, etc.) as well as the attractive vista can be more visually appealing.

In short, education and practice are the path to better photographs.

And after our conversation with the budding photographer, we frequently get the follow-up question, “Is Canon better than Nikon?” <Sigh>

[All images in this post were taken with an iPhone 6 in the Pacific Rim National Park, BC]

Finding the Right Spot

Jedidiah sunburst-3391

We take a lot of photographs in the remote areas of the Washington State and British Columbia.  We travel to a lot of these places on our boat, Salish Lady.  Our boating/photography trips usually involve challenges of selecting a general location, getting there by boat, finding a safe place to anchor, and then launching the dinghy to get to shore.

I think all serious landscape photographers know that getting just the right light is the most important factor in achieving a STUNNING photograph.  However, without some kind of interest in the composition, even the absolute best light and color can’t move a beautiful photograph into the STUNNING category.

Working in the wilderness of Inside Passage makes it doubly hard.  The environment here is beautiful and overwhelming.  Almost every place you stand feels like it should be the “spot”.  But it is also a very complex environment and our eyes do an incredibly good job at distilling the environment for us.  In a photograph, complexity can get in the way of creating the STUNNING image.

Finding the right spot to take the photograph becomes an obsession.  We spend hours and hours trekking across the shore, up hills, and wandering around on small islands.  Don’t get me wrong; we really enjoy this exploration and would do it even if we never had any intention of taking a photograph.  However, finding a spot with just the right “stuff” drives this process.

So how do we decide on the right spot? All the usual rules of composition apply, but the trick we have found that seems to trump everything is simplicity.  We drive to create a simple image, without distractions, but still something to capture the viewers’ emotions.  We like to allow the simplicity combined with the colors tell the story.  When we are really successful, the image tells a story and hints at the broader beauty of the area.  A goal we strive for but rarely achieve.

So when faced with an overwhelmingly beautiful vista, look for the simple composition.  Have faith that from a simple image the story will be clear.

Back on the Water

SalishLady_BohoBay

We are back on our boat Salish Lady for another year of cruising in the Pacific Northwest (and BC southwest).  This year is a little different because I (Shawn) have semi-retired from some of my business concerns and hope to be fully retired by the end of the year.  Although I still have some business responsibilities, this is the first time in many years where I can set my own agenda every day.

Spending time on our boat has helped with the transition because there are always maintenance tasks to be completed.  She can be a demanding lady at times.  Boat projects are a nice distraction because they are discrete tasks that can be planned and completed in a few days.  It is always nice to progress through a “To Do” list relatively quickly.

I was very fatigued because the last few years have been extremely stressful. The downtime I have had in the last month to rest and recover has been rejuvenating.

I am now starting to turn my focus to writing and photography, two hobbies that have had the potential to be much more than just hobbies.  In previous years, we had a pretty good stream of articles and photographs that were published in boating magazines, but that activity waned as I had more demands on my time and energy due to my businesses.

Currently, Corinne and I are working on two different book projects.  As I start to put more energy into them, my days have become increasingly busy and it won’t be long before I will whine about never having enough time.  We also plan to put together more of our images with the “she saw/he saw” theme that we initiated last winter.  We post many of these on our Z Frontier Photography Facebook page  (https://www.facebook.com/zfrontierphoto).

All-in-all it has been a nice transition to a new focus for my time and energy and I am enjoying the chance to work on some creative endeavors.

Landscape Photography at a Grueling Pace

Bandon Beach Color Sunset-00350


We just completed a 10-day photography trip. We covered about 2,500 miles between Las Vegas, Nevada and La Conner, Washington; we shot 15 locations, hit all but 3 sunrises and 1 sunset and covered over 10,000 feet of elevation. We shot mountains, beaches, forests and bridges and lighthouses. In short, we had a blast and completely exhausted ourselves.

Landscape photography is unlike any other endeavor. It requires knowledge of photography, hiking, survival and planning skills. It is not unusual to find us out hiking in the pre-dawn darkness to do a sunrise shoot and hiking back in the dark after a sunset shoot. It requires good reliable equipment and through understanding of how to use that equipment so you can find the buttons to adjust the settings. That is before you even consider the knowledge associated with the camera menus and the features and uses of lenses and filters.  It also requires a certain flexibility about signage at parks and waysides. Just what does “open dusk to dawn”really mean? You need to know when to park outside the gates of public places, and which gates will be left open.

Perhaps the most important skill/attribute is stamina. We shot almost every morning. This meant we were out of bed, dressed and heading to the location around 4:30 AM and waiting for the sun around 5:30 AM. It also meant that we didn’t hit the sack until around 11:00 PM after returning from a sunset on a beach and having to clean all the salt spray off the camera gear. We drove around 200 to 300 miles most days. A lot of that driving was on mountain highways. When we arrived at a desired location we hiked in during daylight hours to scope out shoot locations for both sunset and sunrise.

I can’t think of any other activity that has so much activity built into a single day. Although it was exhausting, it really is living to the max!

If you would like to see more of the images from our trip, please visit http://www.zfrontierphoto.com and click on the Gallery button, then look in the collection of “NEW” images.


Night Photography

Captured image of Pixel Stick using a Canon 5D Mark III, using a EF24 - 105 mm len, at ISO 100, f/11, 33 sec exposure
Captured image of Pixel Stick using a Canon 5D Mark III, using a EF24 – 105 mm len, at ISO 100, f/11, 33 sec exposure

We have recently found ourselves doing quite a bit of night photography.  During a recent trip to Death Valley, we seemed to concentrate on shooting stars, wagons and dunes at night.  Last night, we were out with a photography club “light painting”.  It must be getting warmer.  Corinne really enjoys photographing at night.  I enjoy shooting as long as I am not cold.

As an exercise, shooting at night forces you to become very familiar with your camera setting.  More importantly, you become pretty familiar with what those setting actually do!  Experimenting with F-stop, ISO and shutter speed give direct feedback in low-light shooting.  Adding “long exposure noise reduction” also has a significant impact on the process of taking photographs at night.  It gets especially fun when your eyes no longer predict what the camera sees.

There are a number of YouTube videos and blogs that will tell you the keys to night photography.  From a photographic perspective, we take a lot of test shots before we actually try to make our “keeper” shot.

However, we think the most important consideration for night photography is dressing for the conditions.  Even in very warm environments, like the desert, it can get cold at night.  Having warm cloths, gloves, a hat can really make a difference in your comfort.  We also like to pack small chairs with us on our night photography trips.  You will be taking long exposures sometimes these are hours in length.  Having a comfortable place to relax can really improve the experience.  Snacks and drinks also contribute to a nice evening.